

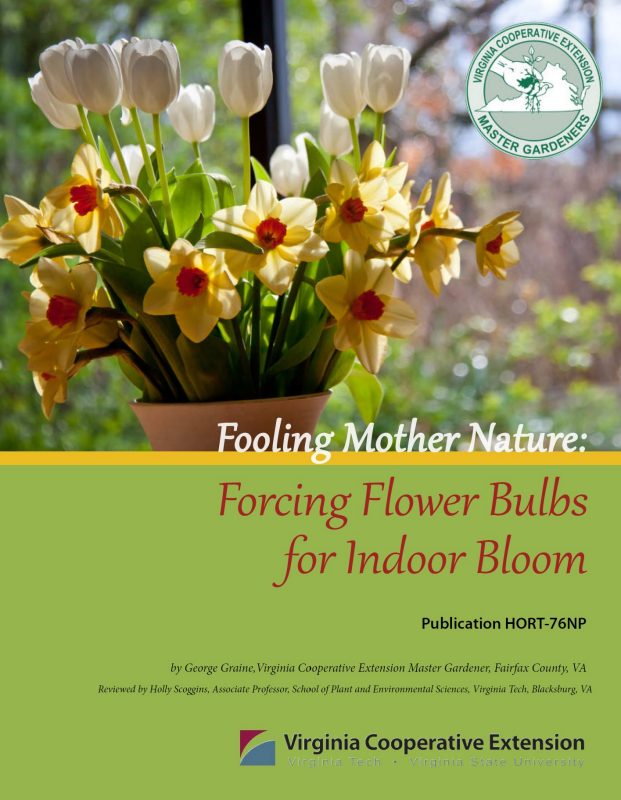
Fooling Mother Nature: Forcing Flower Bulbs for Indoor Bloom
ID
HORT-76NP
Introduction
Have you ever wondered if it is possible to enjoy the beauty of bulbs in the middle of winter? The answer is definitely yes! Many people are familiar with the hourglass-shaped vase filled with water and topped with a hyacinth bulb, or a low bowl filled with several Paper White narcissus, and the popular boxed amaryllis bulb as a welcome winter holiday gift. Most bulbs can be forced but additional planning is required in order to have a successful period of blooms.
To set the record straight, the word “bulb” is often used as shorthand for popular plants called daffodil, tulip, crocus, and hyacinth. In fact, the word bulb is not accurate because the proper botanical term for various types of bulbs is “geophyte.” This includes true bulbs, corms, tubers, tuberous roots, and rhizomes. See Table 1 for examples of each. Regardless, all of these bulbs have one thing in common that separates them from other flowering annual and perennial plants: bulbs have an extraordinary selfcontained food storage tissue that nourishes the plant no matter the environmental conditions, be it cold or hot.
When gardening outdoors, one needs to consider the right plant, right place paradigm. Likewise, this consideration should be adhered to indoors in order to maximize success when manipulating nature and forcing bulbs to flower outside of their usual sequence.
There are essentially two types of bulbs for indoor forcing, those that require a cold period and those that do not need a low temperature because they are more flexible as to temperature extremes. For all intents and purposes, this publication concentrates on bulb forcing of true bulbs and corms.
In the outdoors and under most circumstances, by the end of summer most bulbs have stopped top growth as they begin root growth. This continues until the soil temperature becomes too cold. In the spring, when the temperature rises, shoot growth becomes visible and shortly thereafter, the bulb sends up a flower. After the bloom period, it is natural for the foliage to die back.
| True Bulbs | Corms | Tubers | Tuberous Roots | Rhizomes |
|---|---|---|---|---|
 Daffodils |
 Crocus |
 Caladium |
 Dahlia |
 Canna |
 Tulips |
 Gladiolus |
 Anemone |
 Ranunculus |
 Iris |
The leaves perform a valuable process called photosynthesis, which replenishes the storage of food in the soon-to-become dormant bulb in order for the bulb to be capable of flowering the following year. Bulb forcing manipulates nature by changing this natural cycle.
Think about bulb forcing as an orderly process. This includes choosing the bulb, storing it if necessary, selecting the right size container, determining the potting mix, planting (including fertilizer, water and location), providing a cooling treatment if necessary and after care. Other considerations may be color, fragrance, and timing for seasonal enjoyment of winter or early spring bloom.
Storage
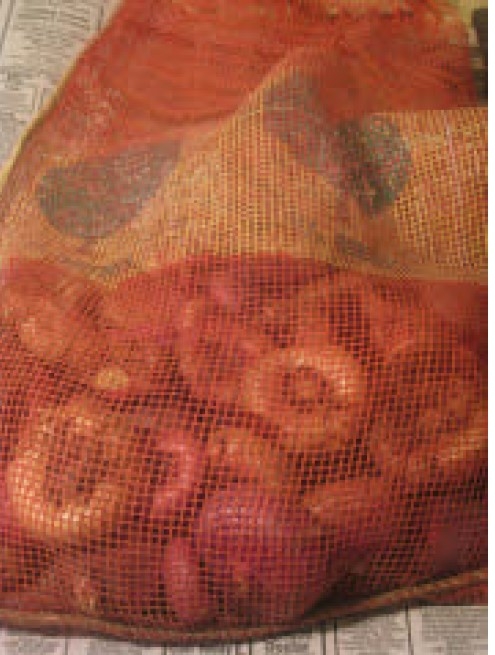
If you’re not planting right away or to stagger bloom times, a mesh bag, as seen in Figure 3, provides ideal storage for bulbs because it allows for good air circulation. A paper bag with some holes is a second choice. Do not store bulbs in a plastic bag as they could become moldy. Label each bag so that at planting time you will be sure of the contents.
Nowadays most homes do not have a cool and dry place (35-55 degrees F); if you do, this makes for a perfect place to store bulbs. If not, choose a place with sufficient humidity to keep your bulbs from drying out, such as a refrigerator vegetable or crisper drawer or an unheated garage. Periodically check on the bulbs for mold. Absolutely do not store bulbs near fruit because the ethylene gas produced by fruit may cause the bulbs to deteriorate and possibly result in no flowering.
Choosing a Container
Most bulbs require a cooling period. For those bulbs that do, when you are ready to plant your bulbs, keep in mind that almost any type of container, even a strawberry pot, can be used for bulb forcing. It is important that the container has a drainage hole and the depth is twice as deep as the bulbs you intend to plant. You need to allow about two inches of potting mix below the bulbs for adequate development of the bulb roots. In other words, a container for crocus bulbs could be much shallower than one for daffodils. Avoid using plastic containers because they hold moisture for long periods and this could result in the deterioration of the bulbs.
Potting Mix
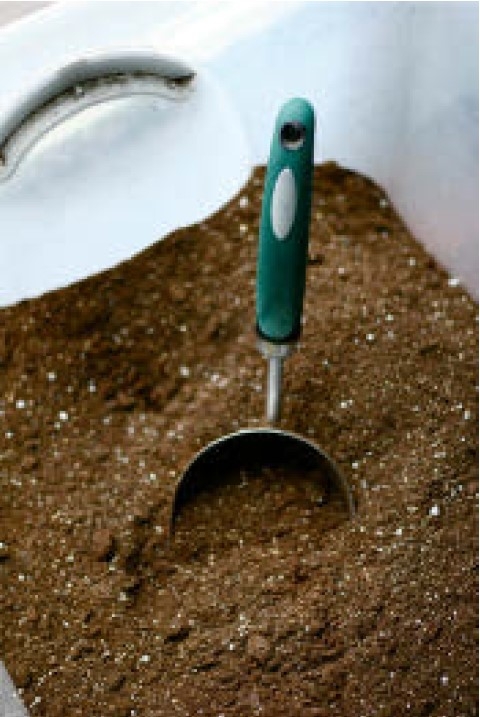
The key ingredient to any potting medium is air. This can readily be achieved with a bag of “professional” soilless sterile mix that is often available at full service garden centers. This mix, as seen in Figure 4, is fluffy, unlike your outdoor garden soil. Of course you can also make your own mix. The ideal formula includes 60-70% sphagnum peat moss, 10-30% perlite, and 0-20% horticultural grade vermiculite. In addition to these ingredients add a small amount of fertilizer, a wetting agent, and lime in order to provide a neutral balanced pH level. All of these additional products will probably be available at the same garden center that has the soilless mix.
Planting
Depending on desired bloom time, pot up bulbs between September and December. A simplistic but not guaranteed flowering schedule is to plant in mid-September for late December flowers, mid-October for flowers in February, and mid-November for March/April flowers. In other words, expect about a three month wait period before a planted bulb blooms.
Take care when placing bulbs in the growing medium. Do not pack down the potting mix around the bulbs as drainage is critical; however, the soil needs to be firm enough in order to retain adequate moisture throughout the growing period, and to hold the bulbs in place. The planting mix should be within a ¼ to ½ inch of the container rim to allow for watering the bulbs.
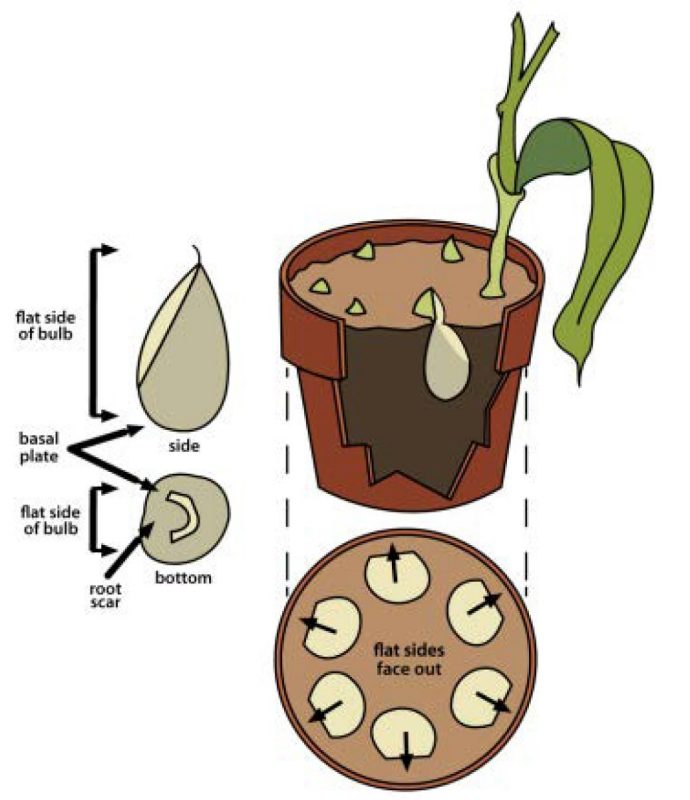
Do not follow the outdoor planting instructions that came with the bulb. This should not be a cause for concern because bulb forcing operates in a completely different environment. In fact, some bulbs such as daffodils, tulips, and hyacinths can be planted so the tips of the bulb show above the potting mix whereas small sized bulbs like crocus, grape hyacinth, and snowdrops should be covered completely with about one inch of soil.
Also to be ignored are the spacing instructions that are noted on the bulb package. Ideally, fill the container with bulbs planted closely together but not touching. The closer together the bulbs are, the more flowers you will have at bloom time.
Forcing tulip bulbs is somewhat unique. As seen in Figure 6, they should be planted with their flat side towards the outside of the container in order to create a nice appearance that will be uniform all around the container instead of crowding towards the center.
Cooling Period
Hardy bulbs (not tubers and rhizomes) should be cooled after planting in a container. Note that some bulb packages may indicate that the bulbs have been pre-cooled. The ideal cooling period can range from 10 to 15 weeks and possibly longer. During this period of time the plant roots are forming and the stem length is increasing.
Cooling Indoors
If cooling bulbs indoors, use the same guidelines as listed in the storage section above, finding a place that is consistently 35-55 degrees F, such as a root cellar, an unheated garage, or even a refrigerator, if you have the space. If you stored bulbs in a refrigerator prior to planting, then subtract that storage time from the cooling period. Note that if you increase the number of cold weeks, the stems will be too short and the flowers will not properly develop.
Cooling Outdoors
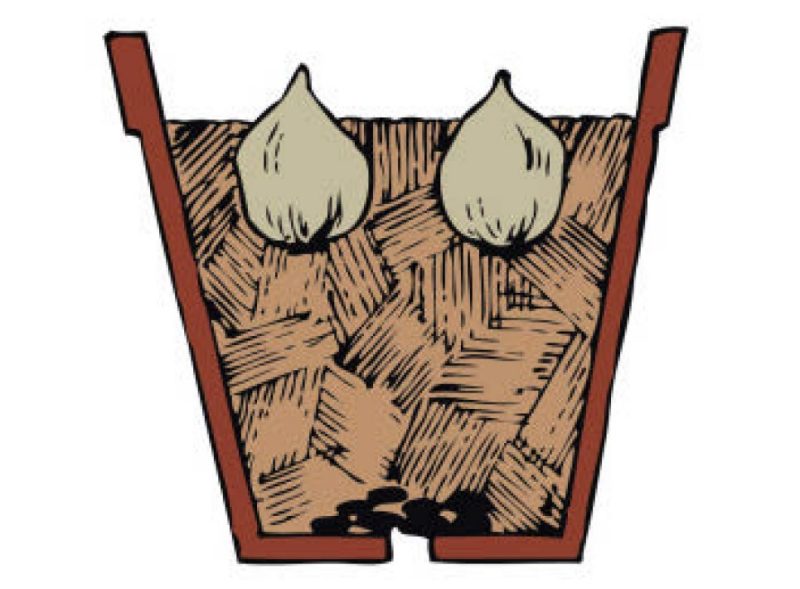
If you do not have an indoor location that is consistently cool enough for your potted bulbs, you may consider cooling them outdoors. The best way to do this is to use a cold frame. Alternatively, you can dig a trench and cover the bottom with some sort of drainage material. Place the pots in the trench and bury them, covering the tops of the pots with leaves, straw, or mulch. Make sure your pots stay moist during the cooling period.

Bloom
After cooling the bulbs, place them in a warm location (60-65 degrees F) that receives indirect sunlight. By doing this, the bulb will form leaves and flowers. When the shoots turn green, expose the potted bulbs to a warmer area with more light. This will further stimulate growth and flowering. By regularly rotating the container a quarter turn so that all of the foliage receives an equal amount of light, you will achieve greater symmetry in the container.
In about three or four weeks, flower buds should be visible. At this time when the buds are starting to color up, move the container into indirect sunlight. This will help prolong the flowering period. For longer lasting flowering, move the container to a cool room each evening. Throughout the entire period of forcing, keep the soil evenly moist. How often you need to water will depend on the specific temperature and humidity condition of your home. Table 2 shows expected bloom times after cooling for several commonly forced bulbs.
Forcing bulbs to flower in winter varies with the type of bulb and month. Often a clue for flowering is indicated on the bulb package such as early, mid, or late spring. Examples of daffodils and tulips that flower in January-February and March-April are indicated by cultivar and color in Tables 3 and 4.
| Common Name | Scientific Name | Cooling Time (Weeks) | Weeks to Bloom After Cooling |
|---|---|---|---|
| Amaryllis | Hippeastrum spp. | none | 6-8 |
| Dutch Crocus | Crocus spp. | 12-14 | 2-3 |
| Daffodil | Narcissus spp. | 13-15 | 3-4 |
| Checkered Lily | Fritillaria meleagris | 15 | 3 |
| Glory of the Snow | Chionodoxa luciliae | 15 | 2-3 |
| Grape Hyacinth | Muscari armeniacum | 14-15 | 2-3 |
| Dutch Hyacinth | Hyacinthus orientalis | 10-13 | 2-3 |
| Bulbous Iris | Iris reticulata | 15 | 2-3 |
| Paper White Narcissus | Narcissus tazetta | none | 5-6 |
| Siberian Squill | Scilla siberica | 15 | 2-3 |
| Snowdrop | Galanthus nivalis | 15 | 2 |
| Tulip | Tulipa spp. | 14-20 | 2-3 |
| Winter Aconite | Eranthis hyemalis | 15 | 2 |
| Months of Flowering |
Yellow | Height | Bi-color | Height | White | Height |
|---|---|---|---|---|---|---|
| January & Februay |
Carlton | 14-16” | Barrett Browning |
14-16” | Ice Follies | 16-18” |
| January & Februay |
Tete-a-Tete | 5-6” | Jack Snipe |
8-10” | Mount Hood |
15-17” |
| March & April | Dutch Master |
18-20” | Accent | 14-16” | Cassata | 16-18” |
| March & April | Unsurpassable | 18-24” | Bridal Gown |
14-16” | Printal | 12-18” |
| Months of Flowering |
Red | Height | Yellow | Height | Multi | Height |
|---|---|---|---|---|---|---|
| January & Februay |
Couleur Cardinal |
12-14” | Monte Carlo |
10-12” | Flair | 10-12” |
| January & Februay |
Merry Christmas |
12-14” | Yellow Present |
12-14” | Monsella | 10-12” |
| March & April | Arma | 18-24” | Strong Gold |
13-17” | Gavota | 16-18” |
| March & April | Red Riding Hood |
8-12” | Yellow Mountain |
12-18” | Prinses Irene |
12-14” |
Bulb Forcing Without Cooling
Some bulbs do not require a cooling period. This is probably the easiest way to enjoy spring flowers during the cold months of winter.
Paper White Narcissus
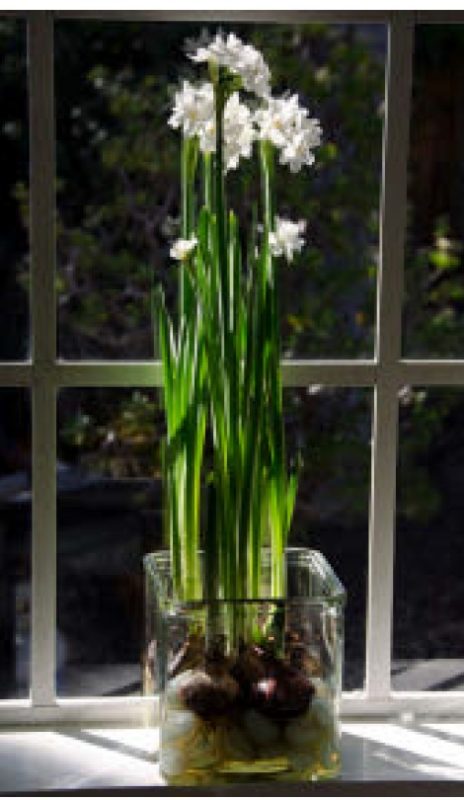
Paper White Narcissus, as well as its yellow cultivar ‘Soleil d’Or’ and the Chinese sacred lily (Narcissus tazetta orientalis) can be easily forced. Paper White are perhaps the most effortless bulb to force. In fact, by making successive plantings about every two weeks starting around the middle of October you could have flowers by Thanksgiving time through the end of March.
The easiest way to force these bulbs is by placing two or three inches of pebbles such as pea gravel into a shallow bowl without a drainage hole. The gravel should be approximately one inch below the top of the bowl. Add water until it is just below the surface of the gravel. Now set the bulbs in the gravel so that they remain in place.
When potted this way, you should see blooms within three or four weeks.
By putting a large number of bulbs in the container, you will achieve a dramatic effect. Note that the fragrance of Paper White can be quite potent, especially in larger quantities. This may not be agreeable to some people, but you will not know until you give them a try.
It is important to monitor the water level in the container because the plant roots need water, and you will also have normal water evaporation in a warm house. Start these plants in low light until they become rooted and you see some shoots. After that, bring the container gradually into direct sunlight, as in Figure 9.
Amaryllis
Boxed amaryllis “kits” often readily available at garden centers, big box stores, and sometimes grocery stores, usually include planting directions. Conversely, when purchasing a loose amaryllis bulb (generally only available at a garden center) it will probably be a top size bulb (34 cm bulb circumference) and will grow without any special treatment. Garden centers and particularly the choices contained in bulb catalogs are amazing. Aside from the many colors and bi-colors, these bulbs are classified as single, double, novelty, and even diminutive miniature varieties (20 cm).
Amaryllis bulbs do best when pot-bound, that is, grown in a pot that allows for soil one inch all around the sides of the bulb and one to two inches below. For best results use a professional planting mix. (See section on potting mix above.) The bulb should be exposed so that 1/3 to ½ of the bulb is above the soil level. Center the bulb in the pot, spread out the roots and add soil.
The key to a successful and longer bloom period is heat. At the beginning do not overwater the bulb. In fact, once a week is usually adequate. After the first sprouts appear, water more frequently. Rotate the pot every few days in order to keep the stems straight. Place the pot in the coolest part of your home each evening during the flowering period as this will help to sustain a longer bloom period.

Water Method
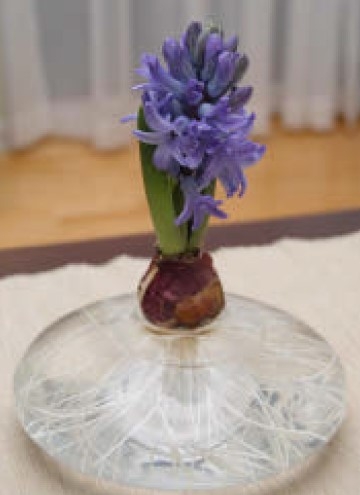
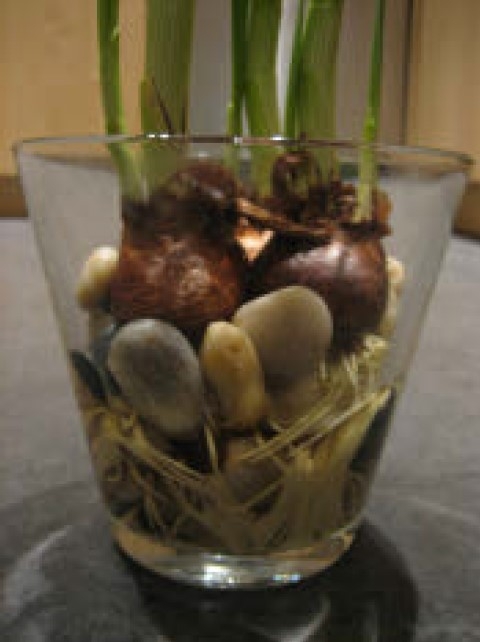
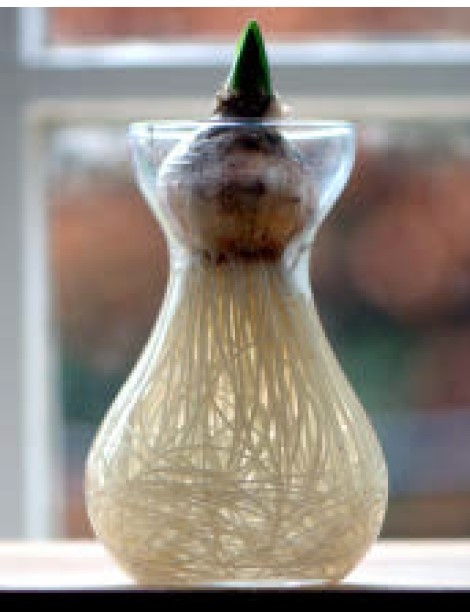
This method of forcing is often reserved for growing hyacinths or crocus in a specially designed hourglass-shaped vase often available at a garden center.
Place a single bulb in the collar (top) of the container and fill water to a level ¼ inch from the bulb bottom. To prevent rotting, do not let the water touch the bottom of the bulb as the roots will grow down into the water.
Garden centers often carry pre-cooled bulbs that are ready to be forced. The best month for starting these bulbs is October. Place the vase with bulb in a cool dark location until you see about three to four inches of top growth and the hyacinth flower cluster begins to emerge from the bulb. Be patient because hyacinths may take eight to twelve weeks to reach full bloom. Once growth is well established, move the vase to a cool and bright window.
The Big Show
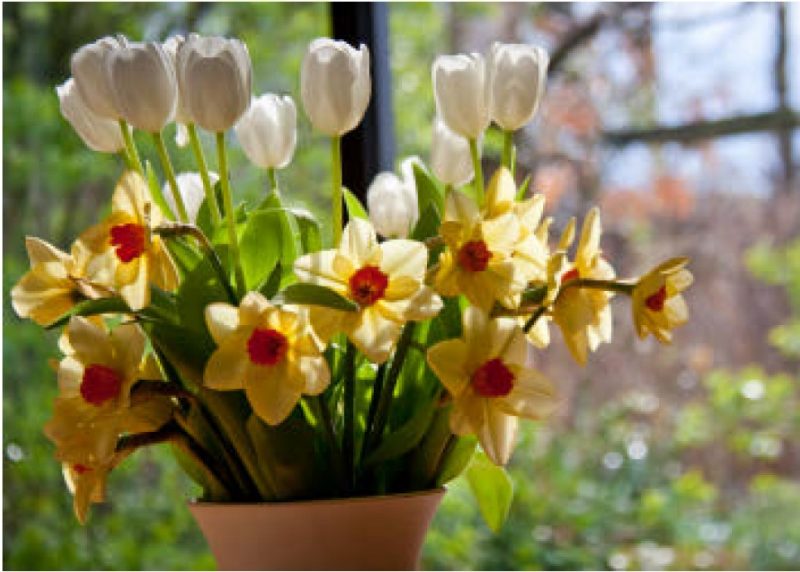
All of the information provided so far leads to the questions of what to plant and how in order to have beautiful, colorful, and dramatic containers filled with bulbs. There are numerous ways to achieve all of these objectives. For example, using only a single type bulb in a six inch container can really make a statement. This could be five daffodils or six tulips or three hyacinths or at least 15 crocus (or other small bulbs). Using a single type of bulb tends to ensure a big show because of uniform flowering.
If you were to plant a variety of bulbs in one container, ideally they should be timed to blossom simultaneously for the best display. Another method of planting bulbs is by layering different species at different planting depths, as seen in Figure 12. This is called “lasagna” or “sandwich” planting and will provide a succession of color over a longer period of time. In this case a larger container (e.g., 15 inch diameter by 12 inch high) will provide more planting depth.
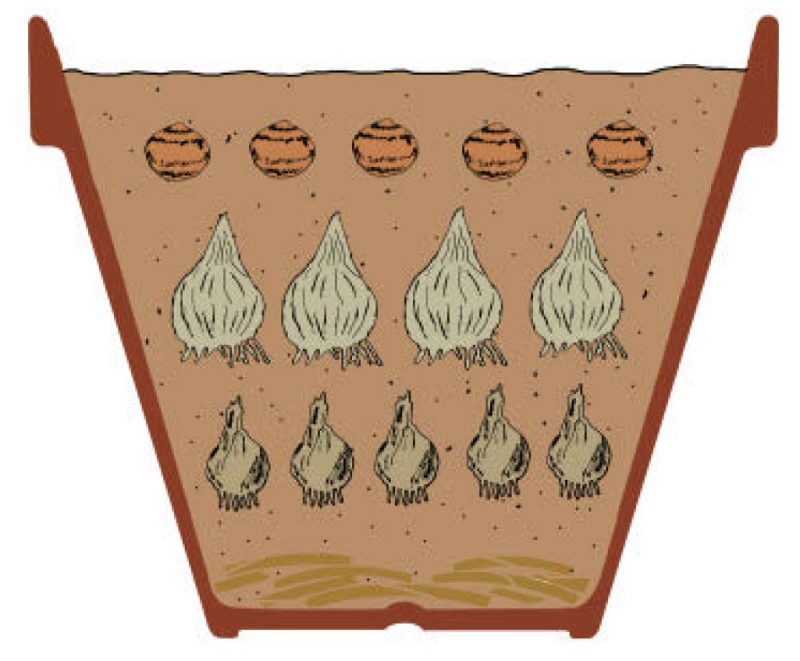
An exciting example of triple layer planting could be a single color scheme such as red, yellow, blue, purple, etc. If you prefer a mixture of colors, consider this idea: 15 tulips as the bottom layer, nine hyacinths in the middle and 30 crocus or rock garden iris on the top. Just as easily one could plant bulbs in two layers. In any case, the bulbs in each layer should be planted a little further apart from one another and the layer of soil between each layer of bulbs should be at least one inch. The key to layering bulbs is to consider the bloom time. That means the bulbs in the top layer should be those that bloom first and the bulbs with the latest flowering period should be placed as the bottom layer.
After Care
Saving forced bulbs after they bloom for planting in the landscape in spring is an iffy proposition. Even saving them in the container while dormant for fall planting could be disappointing, but it may be worth a try as an experiment. The probability of forced bulbs successfully blooming the following spring is doubtful, but you may have better luck the next year. As for most tulips and hyacinths, they have seen their best day. Treat them as an annual and discard them after they have finished flowering.
After paper white bulbs have finished blooming, you may or may not be able to save these bulbs for outdoor use. Some tazetta type bulbs vary regarding USDA hardiness zone map; therefore, check the bulb package for additional instructions. Paper white are not hardy, so they cannot survive outside except in the mildest of climates.
Unlike Paper white narcissus, amaryllis can be saved for the next winter by following these few growing tips. Place the potted plant in an outdoor sunny location in the summer and fertilize it throughout the growing season. When fall arrives, cut off all of the leaves, stop watering, and do nothing for about two months. After this late fall “resting” period, start the forcing process all over. It is a good practice to repot the bulb in a fresh potting mix.
Summary
Beautiful flowers with bright colors and fragrance can be yours throughout the winter if you act in the fall. Bulb forcing is a most satisfying hobby even if you are not an ardent gardener. It is not expensive and with only minimum care, at the right time, you will achieve your goal. Good results can happen without a greenhouse or some sort of temperature controlled room. Furthermore, you will be amazed by the beautiful indoor garden that you created by manipulating nature within your own home.
Video Resources for Bulb Forcing
Check out the following videos on YouTube for further information on forcing:
- Hyacinths
“Tips for Easily Forcing Hyacinth Bulbs”
by Great Gardening Gifts
(http://www.youtube.com/watch?v=o2XiX2h5Mgc) - Tulips
“Planting & Growing Flower Bulbs: How to Force Tulips”
by eHow
(http://www.youtube.com/watch?v=WCJ5ZakMgJE) - Paper White Narcissus, Tulip, Hyacinth, & Crocus:
“Forcing Bulbs”
by Howard Garrett, “The Dirt Doctor” (http://www.youtube.com/watch?v=1F4Sflph-2E&)
Photographs & Illustrations:
Figure 1 (hyacinth blooming) by Christina B. Castro via Flickr (http://www.flickr.com/photos/cbcastro/3402898533)
Figure 2 (tulip bulbs) by Brewbooks via Flickr (http://www.flickr.com/photos/brewbooks/867336001/)
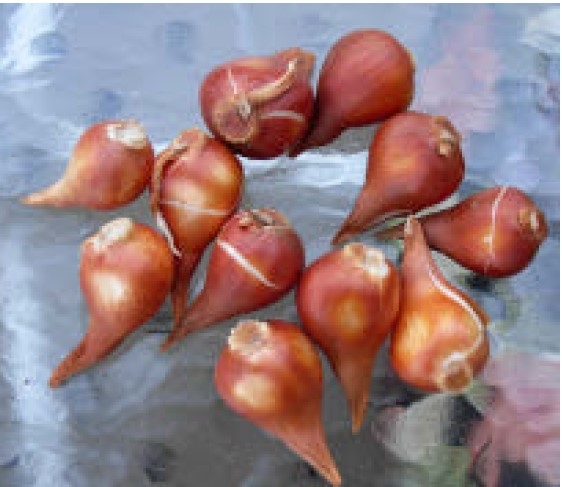
Figure 3 (gladiola corms) by Dawn Pettinelli, Assistant Extension Instructor, University of Connecticut. Photo used with permission; originally posted at http://uconnladybug.wordpress.com/2010/01/20/bulbs-brighten-mid-winters-frozen-grip/
Figure 4 (soilless mix) by Chiot’s Run via Flickr (http://www.flickr.com/photos/chiotsrun/3323193247/)
Figure 5 (planting depth) - Illustration modified (color added) from original created by Purdue University Cooperative Extension Service for Publication HO-19-W, by B. Rosie Lerner (http://www.hort.purdue.edu/ext/ho-19.pdf). Used with permission.
Figure 6 (planting tulip bulbs) by Mississippi State University Extension Service used in Publication 2730, written by Dr.
Lelia Kelly, Extension Professor, North Mississippi Research & Extension Center (http://msucares.com/pubs/publications/p2730.pdf). Illustration used with permission.
Figure 7 (buried pots) - Illustration modified (color added) from original created by Purdue University Cooperative Extension Service for Publication HO-19-W, by B. Rosie Lerner, Extension Consumer Horticulturist, Purdue University (http://www.hort.purdue.edu/ext/ho-19.pdf). Used with permission.
Figure 8 (paper white roots) by Katia Strieck via Flickr (http://www.flickr.com/photos/freeformkatia/2196767873/)
Figure 9 (paper white blooming) by Barbara Wartman, University of California Master Gardener. Photo used with permission; originally posted at http://beesandchicks.wordpress.com/2011/11/22/tuesdays-tips-forcing-paperwhites-pt-2/
Figure 10 (amarylis) by John Starnes via Flickr (http://www.flickr.com/photos/muffintoptn/5328319985/)
Figure 11 (hourglass shaped vase) by Elspeth Briscoe via Flickr (http://www.flickr.com/photos/elspethbriscoe/6549193995/)
Figure 12 (layered bulbs) - Illustration created by Lindsey Nelson, Department of Horticulture, Virginia Tech
Figure 13 (daffodils & tulips) by Chris Goldberg via Flickr (http://www.flickr.com/photos/34325628@N05/7208228022/)
Table 1 Photos:
- Daffodils by Samuel via Flickr (http://www.flickr.com/photos/_sjg_/4297975201)
- Tulips by Ed Yourdon via Flickr (http://www.flickr.com/photos/yourdon/8865428074/)
- Crocus by Tom Petrus via Flickr (http://www.flickr.com/photos/29108580@N08/3357243825/)
- Gladiolus by Scott Butner via Flickr (http://www.flickr.com/photos/rs_butner/3760220837/)
- Caladium by Ron Cogswell via Flickr (http://www.flickr.com/photos/22711505@N05/5919046495/)
- Anemone by Pim Fijneman via Flickr (http://www.flickr.com/photos/28193187@N06/3062010726/)
- Dahlia by Grow4fun via Flickr (http://www.flickr.com/photos/99749295@N04/9440203950/)
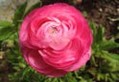
- Ranunculus by 305Seahill via Flickr (http://www.flickr.com/photos/bluehillranch/8566621011/)
- Canna by Cassey via Flickr (http://www.flickr.com/photos/44124299373@N01/3623036617/)
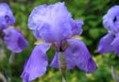
- Iris by Simon Allard via Flickr (http://www.flickr.com/photos/8312987@N03/3745997779/)
Reviewers:
- Holly Scoggins, Associate Professor, School of Plant and Environmental Sciences, Virginia Tech, Blacksburg, VA
- Adria Bordas, Extension Agent, Agriculture and Natural Resources, VCE Fairfax County
- Peggy Fox, VCE Master Gardener, Newport News
- Darby O’Connor, VCE Master Gardener, Fairfax County
Produced by:
Lindsey Nelson, Department of Horticulture, Virginia Tech
Virginia Cooperative Extension materials are available for public use, reprint, or citation without further permission, provided the use includes credit to the author and to Virginia Cooperative Extension, Virginia Tech, and Virginia State University.
Virginia Cooperative Extension is a partnership of Virginia Tech, Virginia State University, the U.S. Department of Agriculture, and local governments. Its programs and employment are open to all, regardless of age, color, disability, sex (including pregnancy), gender, gender identity, gender expression, national origin, political affiliation, race, religion, sexual orientation, genetic information, military status, or any other basis protected by law
Publication Date
October 2, 2019
