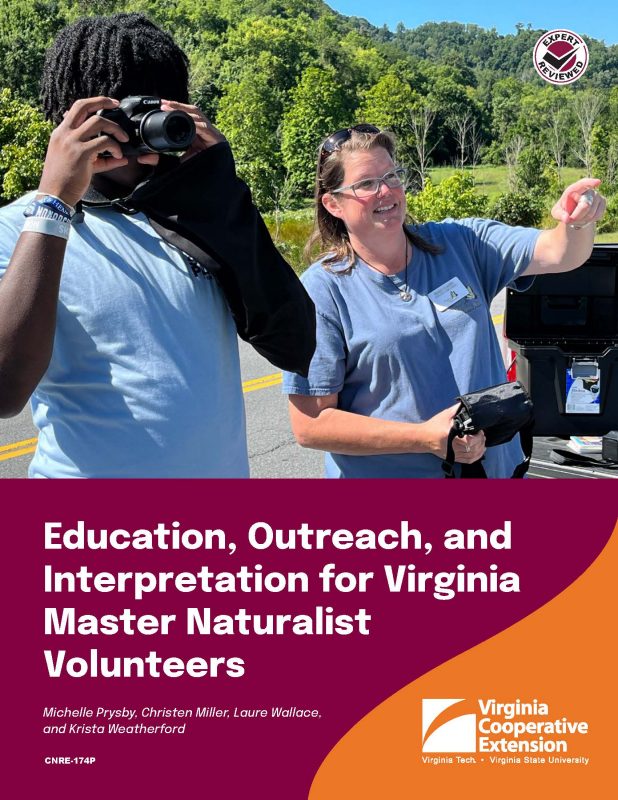
Education, Outreach, and Interpretation for Virginia Master Naturalist Volunteers
ID
CNRE-174P
Are you interested in nature? Do you want to help conserve Virginia’s natural resources?
If you are a Virginia Master Naturalist (VMN) volunteer, you probably answered yes!
Now think about all the people and events in your life that have helped you develop these interests. It is likely that you have had memorable experiences in nature that helped you foster your curiosity about nature, your desire to learn more, and your wish to make a difference. The “Nature of Americans” study of almost 12,000 youth and adults found that the majority of Americans are interested in nature and value interaction with the natural world, but it also found a gap between their interest and their ability to pursue it in their daily lives (Kellert et al. 2017). With the wide variety of educational programming VMN volunteers can provide, you have the opportunity to help bridge that gap so that more people of all ages and backgrounds can have regularly occurring, meaningful experiences in nature that meet their personal interests and needs.
Following are some of the diverse ways that VMN volunteers can be involved with educating others and facilitating their connections to nature.
- Lead outdoor nature walks.
Example: VMN volunteers in the Middle Peninsula Chapter partnered with the NAACP to lead a birdwatching walk for Black Birders Week. - Give presentations for community groups on natural resource topics.
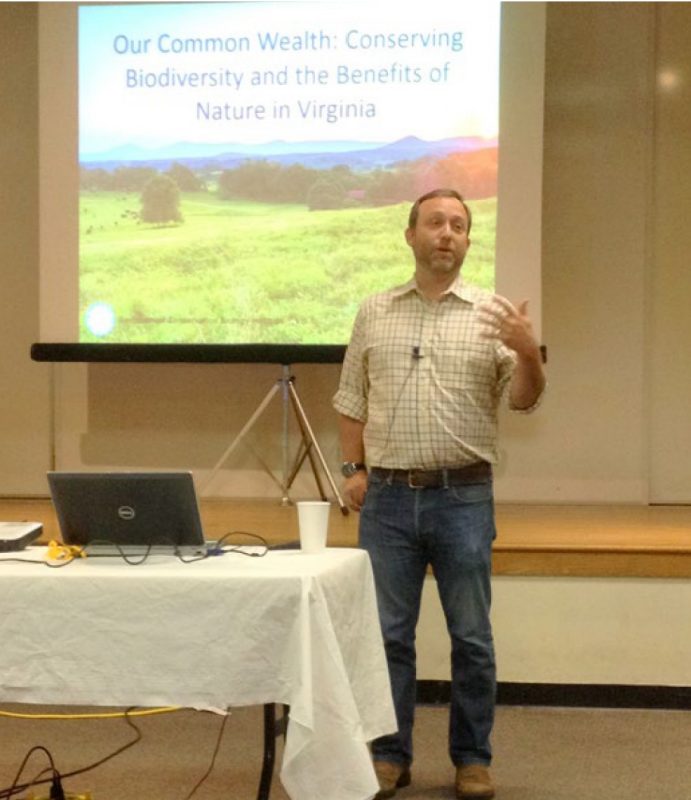
Example: A VMN volunteer in the High Knob Chapter gave an online presentation on pollinators for a nonprofit organization of artists working on flora- and fauna-themed art. - Provide hands-on activities and educational materials at a table or booth at a community event.
Example: Volunteers in the Riverine Chapter set up a booth at the Virginia State Fair to educate visitors about black bears and how to coexist with them. - Lead an environmental education activity for a school class.
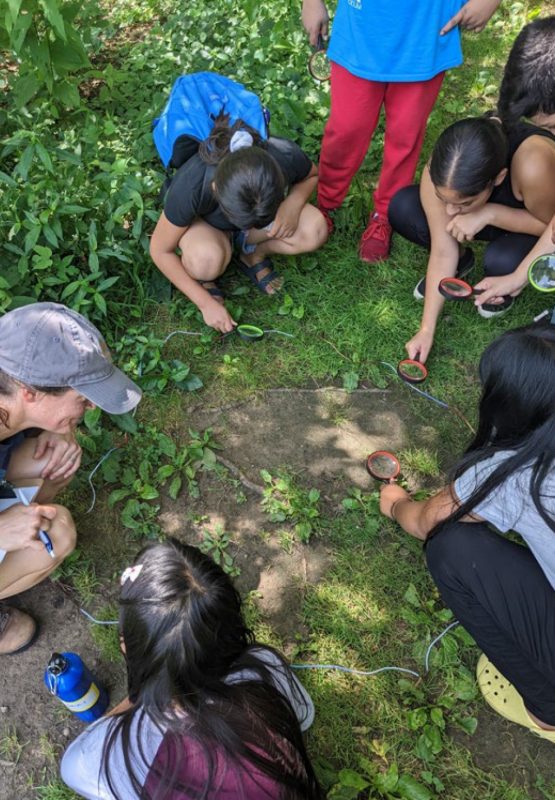
Example: VMN volunteers in the Rivanna Chapter led stations on watersheds for fifth graders during class field trips to the river. - Organize nature camps for youth.
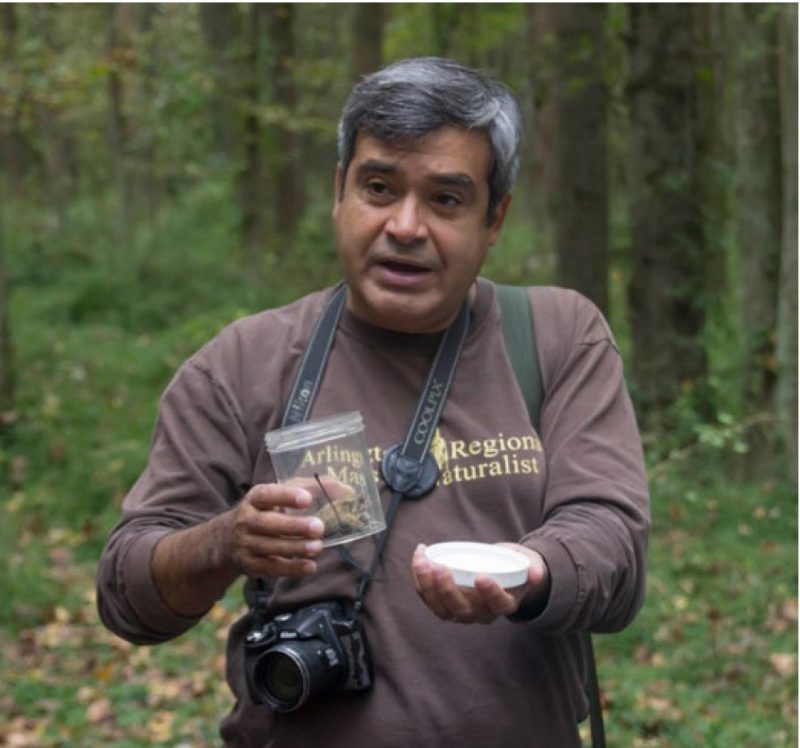
Example: VMN volunteers in the Central Piedmont Chapter collaborated with 4-H and Virginia State Parks to lead a Wildlife Detectives day camp for local youth. - Be a roving nature interpreter at a park.
Example: VMN volunteers from the Pocahontas Chapter assisted with roving nature interpretation at Maymont, a park and museum in Richmond, for visitor engagement. - Develop materials such as interpretive signs, fact sheets, and brochures.
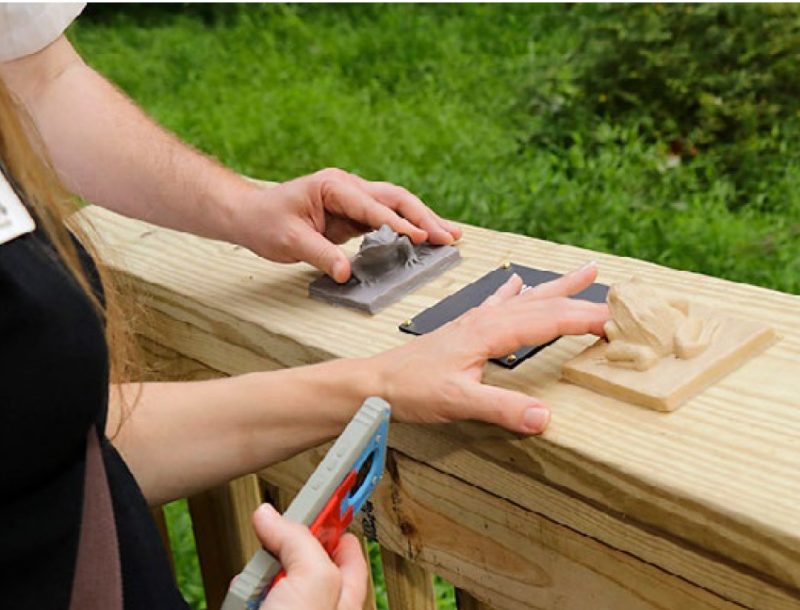
Example: VMN volunteers in the Shenandoah Chapter created interpretive signs and an audio tour for the Sensory Explorers’ Trail at Sky Meadows State Park. - Write natural resource articles for a local newspaper or community newsletter.
Example: VMN volunteers in the Central Virginia, Old Rag, and Historic Southside chapters have contributed regularly scheduled columns on nature topics to their local newspapers.
In addition to these planned programs, VMN volunteers regularly share their passion with others when they volunteer at activities like habitat restoration or wildlife monitoring in public areas. They are often approached by members of the public who ask who they are and what they are doing, allowing volunteers to spontaneously provide informal education.
Whether it is a booth at an event, a public nature walk, or a formal presentation, there are skills you can build and approaches you can take to be an effective educator. This publication provides guidance on those basic skills as well as tips for leading specific types of education programs.
1. Know Your Audience
Knowing your audience is a critical part of delivering a successful program. It starts well before you deliver your program as you plan for the diverse nature of the participants, and it extends through delivering and evaluating your program.
The VMN program has an important goal to increase diversity, equity, and inclusion throughout all aspects of the programs we provide. Through our training and interpretive programs, we have the opportunity to increase participation among groups that are currently underrepresented, to make all people feel welcome, and to show that differing perspectives and cultural interpretations of our natural world are respected and valued. Our goals are to engage more diverse audiences in our education and outreach programs and to reduce barriers to participation in our programs for the public.
Following are some aspects of diversity and inclusion to consider during the preparation phase of an education program. Throughout the publication, we include additional tips to use in other phases to help make your programs more inclusive.

Prepare Yourself to Lead Effective Programs for Diverse Audiences
- Examine your assumptions about people who are different from you. Be open to letting go of those assumptions.
- Use self-assessment of bias, such as the Instructor Bias Assessment from the AvarnaGroup (2017) or the online tools from Project Implicit (n.d.).
- Work to increase your empathy to better understand other people’s experiences (Dam and Siang 2020).
- Consider why engaging a diverse audience is beneficial for your particular program. In general, engaging a wider diversity of people builds support in the community for the conservation of the critical natural resources you are focused on. Also, that engagement may build a connection for future VMN members. Outline other benefits of effectively reaching a more diverse audience for your program.
Imagine and Learn About Your Audience
- Find out about the potential audience. If you are giving a program at an established venue or in partnership with an established organization, the venue or organization’s leaders should be able to provide information about the general audience you can expect to participate in your program. Use their experience to learn who might attend and what interests them. Or if you have a new potential audience you hope to engage, consider reaching out to community leaders who can share what topics are important to those people. Community leaders also are a great resource to help promote your program once it is available.
- Consider all aspects of diversity. Race, gender, culture, age, economic status, religious affiliation, and ability/mobility are just some of the many aspects of diversity that frame the perspective of those people you hope to reach with educational and interpretive programs.
Many aspects of diversity are not outwardly visible, such as educational background or level of access to technology. As you prepare, spend time thinking about the many aspects of diversity that contribute to the identities of your audience members. - Consider that not everyone has the same experiences in nature. Not everyone feels the same way or has the same experiences or the same expectations about your topic. There is more than one way of knowing and caring about the environment and engaging in nature. Understanding the diverse ways of knowing gives you and other participants added ways to engage in nature.
2. Plan a Topic, Theme, Goals, and Objectives
Before any educational interaction, you should spend time thinking about what you want the outcome to be. What is it that you want someone to learn, be able to do, or become interested in after interacting with you? If they leave your program with one thing in mind, what should it be? Developing a topic, a theme, overarching goals, and supporting objectives will aid you tremendously in building an effective educational interaction.
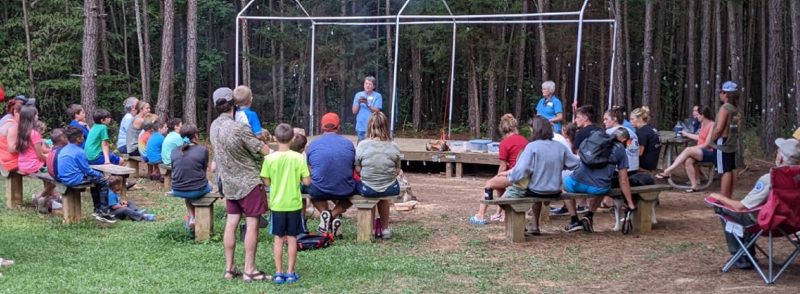
VMN volunteers lead a campfire program at Claytor Lake State Park. (Photo courtesy of Judith McCord.)
Your topic is the general subject matter, such as “birds,” “trees in winter,” or “litter in our waterways.” Sometimes you will choose your own topic, and other times it will be set by a group that has asked you to present (“Can you give us a talk on native plants, please?”). Identifying your topic is not hard, but it is just the first step in the process. What is especially key is developing your theme.
Diversity and Inclusion Tips
Identify what is important about your topic for diverse audiences. Imagine the different identities of the people who will take part in your program. What if everyone was (pick one aspect, such as they are all older, younger, etc.)? Do a thought experiment. How would this knowledge refocus your presentation, your examples, and your choice of language? Knowing the potential diversity of your audience will help you deliver a program that makes a connection between the interests of the participants and the importance of the resource you are talking about.
What Is a Thematic Program?
When you have delivered a good educational program, your audience should be able to summarize it in one sentence. That sentence is your program’s theme. A theme is the central idea, purpose, and main point of your presentation. It is not the same as your topic, which is the general subject matter. The theme is the message you are trying to convey or the story you want to tell about that topic. If you say to a family member, “Rain!” — that is a topic. “It’s going to rain today, so we’ll need our umbrellas,” and “We haven’t had rain in weeks, so let’s water the garden” are two very different themes relating to that topic.
A theme is the central idea stated in a single, complete sentence. Although you should know some things about your topic, relating a collection of facts to your audience is not something they are likely to enjoy and remember. Instead, you want to give them a message that they can take home, one that they will remember. This is true for a guided walk, a van tour, a canoe trip, a slide program, or any other type of program you might give.
Without a theme, your program will be too broad in scope and, therefore, too shallow to be meaningful. If you do not have a theme, you risk having your program become only a collection of names and facts — an identification of organisms without any connections, for example — or lacking in context.
Think of a string of popcorn. The string is like the theme that ties everything together, and the popcorn is the facts, anecdotes, and interesting examples that make up your program. Without that string, the popcorn ends up in a pile. Without a theme, your program will simply be a collection of facts and will therefore be less effective than it could be.
Having a theme will also help you keep your program on track. A theme limits the facts you present so you don’t overwhelm people with too many details. Remember, it is more important to light a spark of interest in your audience than to tell them everything you know!
The following rules should govern theme development:
- A theme should be stated as a short, simple, and complete sentence (which must contain a subject, a verb, and an object) that contains only one idea.
- A theme should connect tangible topics with intangible concepts. That is where your audience will see themselves in the topic.
- A theme should reveal the overall purpose of the presentation.
- A theme should be specific.
- A theme should be worded in an interesting and motivating style when possible, using active — not passive — verbs.
- A theme should have “Ah-ha!” value and should answer the question “So what?”
When you plan a program, ask yourself the following questions:
- What is the one thing I want people to know about this subject?
- What is the one thing that I want them to remember?
- How can I show them that they share a common bond with the resource?
Together, those answers define your theme.
Few tools are more important than the theme when it comes to selecting and organizing ideas for a presentation. People remember themes — they forget facts.
Examples of themes:
- Just like our highways of today, for many years the James River was the major route of travel and transportation in Virginia.
- Preserving biodiversity is like having a life insurance policy.
- A fantastic plumbing system lies under the ground.
- We can discover who shares our world by studying the clues and evidence wildlife leaves behind.
- The landscape of this area bears the marks of people who lived here a hundred years ago and helps us understand how we can leave no trace.
- Walking in the woods at night can help us understand how nocturnal animals survive and teach us our role in protecting this space.
- We cannot survive without trees.
Table 1 provides examples of how a single topic could be converted into many different themes, depending on the audience, the program, and what the presenter wants as the focus.
| Topic | Some Possible Themes |
|---|---|
| Snakes | Snakes can teach us about the beauty in our differences. We have all felt misunderstood at some point in our lives. Whether venomous or not, all snakes are beneficial to humans. |
| Pollinators | Our future flies on the wings of pollinators. You can’t have pizza without pollinators. |
| Songbird decline | Native songbirds in this country are rapidly disappearing, but humans can help conserve their populations. Songbirds are more than colorful and musical entertainment - they keep nature in balance. |
| Bald eagles | Just like you, bald eagles require a large and varied habitat to survive. Bald eagles are a conservation success story and give us hope in the work that we do. |
| Winter weather | Winter weather can be fun; knowing how to dress for it can keep you safe. Winter brings us a time to rest and reflect, and we can learn those lessons in nature. |
What Are Goals?
After you have the theme of your program, develop one or more goals you would like your program to achieve. You can think of a goal as the overall purpose of your presentation. It is a very general concept that you hope your audience will understand or feel at the conclusion of your program.
Examples would be “to inspire an appreciation of the environment,” “to impress upon the public the importance of conservation actions,” “to help a visitor feel comfortable and oriented to the park,” or “to gain an understanding of safety hazards.”
What Are Objectives?
An objective is a statement that tells how you will measure whether you are accomplishing your goal. The following ABCD formula is for developing objectives.
A. Audience – All objectives refer to an audience who will perform a certain task.
B. Behavior – All objectives contain active behavior verbs and their accompanying objects: What will the audience do? The behavior must be measurable in some way (the audience will list, state, identify, name, describe, construct, or order).
C. Conditions – All objectives contain conditions or restrictions upon behavior: when, where, or how will they do it?
D. Degree of success – All objectives contain a degree of success or a quantitative restriction: How will you know they have done it?
An objective of this publication would be, “After reading this publication (C), VMN volunteers (A) will be able to describe (B) three components of program development (D).”
A possible objective for a program on pollinators could be, “After attending this program (C), participants (A) will be able to list (B) two reasons native bees are important to our local ecosystems (D).
The combination of a topic, theme, goal(s), and objectives helps to make a solid program and can give you increased confidence in the planning process.
3. Know your Resource: Research and Prepare
After you have decided on the theme and established the goals and objectives for your program, you are ready to find the information you need to develop it. Preparing your programs at least two weeks in advance should allow you enough time to research most topics.
The typical VMN volunteer has a thirst for learning, and you can use your presentation preparation as an opportunity to learn a lot more about the topic, resource, and/or site that is your focus. Do not feel, however, that you must include everything you have learned through your research in your program. As the presenter, your job is to curate the vast amount of information that might exist on the topic into a smaller amount of information that supports your theme and makes a connection between the audience and the resource.
Identifying Topic, Theme, Goals, and Objectives: A Summary
Topic: What is your presentation/program/publication about?
Theme: What is the main takeaway message participants should remember?
Goals: What is the purpose of your presentation/program/publication?
Objectives: What do you want your audience to learn and be able to do after participating?
Diversity and Inclusion Tips
- Identify why your topic might be important to diverse groups. Develop a list of all the reasons that the resource you are talking about could be important to those who attend your presentation and how you can weave that relevancy into your presentation. This research can be done through surveys, talking with community leaders, or community discussions.
- Put aside your fear of questions. Part of what we should model is that there are many questions that you might not be able to answer, but there are many ways of getting a question answered. In fact, your participants could have the answer or have another cultural way of answering the question.
- Prepare your program with a spirit of exploration! Approach diverse audiences with a willingness to learn from them. The more you work across different ways of seeing your resource/topic, the more comfortable you will become, and you will get a better sense of the community’s “way of knowing.”
- Use diverse examples in your program. If you have readings as part of your program, include readings by people from underrepresented populations. If you use graphical materials, include images showing a diversity of people. If you tell stories about your topic, consider how to include perspectives of other cultures.
- Consider where a program is given. Is the venue accessible for a diverse group of people? For example, does it serve those who may be dependent on public transportation? Adjust as possible to allow for full participation by those with different visual, hearing, and motor abilities. The Birdability website (n.d.) provides a wealth of considerations for those who are mobility impaired.
- Include the program’s accessibility aspects if you are involved in announcing or advertising the program. Reach out to underrepresented groups in the area where the program will take place. For example, specifically invite children, people of varying races and genders, those who are visually or mobility impaired, etc., if these are an option. Provide public transportation options. Provide information on other languages spoken if available. People feel included when they are specifically provided with information that shows we are considering their needs.
Use research-based references to provide accurate, unbiased information for your program. Recommended resources include the materials from your VMN training course, publications and websites of the seven VMN sponsoring agencies, and materials from government sources such as the National Park Service and the U.S. Fish and Wildlife Service. In addition, you can seek out and ask questions of local experts, such as the presenters from your VMN training course, college and university faculty, Extension agents, and natural science professionals and interpreters at national, state, and local parks. Be careful to use only reputable sources; the internet is full of unreliable information!
If your program is an outdoor activity, such as a nature walk, your preparation should include a visit to the site. Not only will this scouting visit give you a preview into the features and species you are likely to see on the walk, it is also an important part of risk management. Look for any potential hazards, check to see if you will have cell phone service, and review logistics such as parking options. For more on safety and risk management for all VMN volunteer activities, including checklists to use as you prepare, please read Virginia Cooperative Extension publication CNRE-124P, Safety and Risk Management for Virginia Master Naturalist Volunteers (Prysby 2022).
4. Communicate Clearly and Engagingly
For many people, there are few things more frightening than having to stand and speak in front of an audience. Almost everyone suffers some anxiety about public speaking. Whether you are presenting to a group for the first time or you have done it many times, the fear of facing an audience can strike.
Being nervous is natural and can even be beneficial. For the unprepared presenter, however, stage fright can be a significant barrier and can turn a presentation into a nightmare. The key is to not find yourself unprepared to deliver a program. Here are some tips to help you develop a dynamic presentation.
- Rehearse. Nothing can replace practice. The underlying cause of most anxiety is lack of confidence. The best cure for this anxiety is practice, practice, and more practice. The more prepared you are, the more confidence you will have, and the higher the quality of your program will be. Practice giving your program to yourself in front of a mirror or at the area where you are going to deliver your presentation. Become comfortable with your surroundings.
- Start by getting to know your audience. Engage everyone at the beginning of a program. Let them introduce themselves as they feel comfortable. Get to know the diversity within the group by finding out their experiences and backgrounds. Ask why they came, what interests them about the topic. Ask if there is something they especially want to see or learn about, as well as what they already know about the topic. Along with helping you understand your audience and showing that you care about them, this allows the participants to get to know each other and establish common ground, which will increase their sense of safety in speaking out.
- Help the audience get to know you and the VMN program. Along with the suggestions relating to acknowledging your identity (see sidebar), describe the VMN program and your role as a volunteer. Your educational programs are a great opportunity to recruit future VMN volunteers.
- Share your own excitement about the topic. Be authentic in sharing with them why you feel it is important. Your enthusiasm will be contagious. Then ask them to share their thoughts about why this topic is relevant to their life and community.
- Use multiple teaching modalities. Where possible, use methodology in your presentations to engage multiple modalities of learning — visual, auditory, and kinesthetic (movement-based).
- Use interactive techniques. Promote dialogue rather than straight lecture. Resist the urge to overload your audience with information and instead leave room for conversation. What you learn from them is as important as what they learn from you.
- Engage the quieter participants as they are comfortable. This could happen in a side conversation on a guided walk as you are moving to the next stop.
- Use props and/or audiovisual tools. Be prepared, however, to adapt if technology fails.
- Connect through eye contact. Make eye contact with and smile at everyone in your audience. Speakers can tend to visually relate to people who look more like them. Assume everyone wants to be valued.
- Expect the unexpected. Be prepared to adapt your presentation to exciting and unexpected happenings that might occur. For example, if your nature walk is on trees, think about how you will adapt the sighting of a deer or other animal into the theme of your program.
- Own what you do not know. Be comfortable with saying, “I don’t know.” Focus on the wonder.
- Ask and invite questions. This is a way to keep everyone engaged and aware that you are interested in their perspectives. Rephrase questions and comments from the participants to ensure that everyone understands them.
- Leave out technical terms and acronyms. Use conversational wording or wording at an eighth grade reading level. Include only core information necessary for understanding. You can always expand on points or give additional details later when answering questions or upon request. It is more important that participants understand what something does or how it interacts than to know its name.
- Allow the audience to get involved. Their participation can relieve your stress and give you a moment to regroup. It is more fun for the audience and allows them to contribute to the program. Connect back to what the participants said they care about.
Diversity and Inclusion Tips
At the start of a program:
- Acknowledge your own identity. It may make others see that you recognize other identities.
- Let your participants know your intention to be inclusive. Explicitly state that your intention is to welcome all people and all perspectives. Tell them that you might make unintentional mistakes in understanding who they are and what they want from the program. Welcome their feedback.
- Acknowledge the Native American history and present connections to the area. See “The Honor Native Land Guide” from the U.S. Department of Arts and Culture (2017) for ideas on how to go about it appropriately.
- Do not be afraid to ask for the correct pronunciation of someone’s name. If someone has an accent and you cannot understand them, ask them to repeat what they said slowly because what they are saying is important to you.
- Let participants know that you hope to learn from them as well. Yours is a mutual journey of exploration.
During the program:
- Eliminate figurative language and jokes if the group is culturally diverse. Phrases such as “Now the shoe’s on the other foot” or “Let’s hit this one out of the park” are everyday statements that we use without noticing them, but these phrases may confuse audiences from some cultures. Refrain from jokes that are often misunderstood by other cultures.
- Remember that nonverbal communication is critical. Our nonverbal component may reinforce, contradict, or even substitute for our verbal communication, so you must study these cultural differences ahead of time. Gestures we use in the United States, such as a thumbs-up or OK sign, are considered obscenities in some cultures and carry much different meanings.
- Ask the audience to share their experiences, knowledge, and stories throughout the program. Be open to the skills, knowledge, experiences, and cultural ways of knowing they bring to the discussion.
- Be comfortable with silence. In some cultures, silence is a measure of respect and attention.
- Engage the youth. They are part of the audience too. Think of ways to allow them to participate by directing questions to them, asking them to look for something specific, and/or having them use their senses to describe sights, sounds, textures, etc. For example, if you are on a walk, ask them to be your eyes to look for plants or signs of animals.
As you give programs, keep these points in mind. Remember that to feel comfortable while delivering your presentation, you must feel confident.
Practice is your most important tool for developing confidence.
5. Document and Evaluate
Keep records of what you did and presented so you can easily present the same program again without having to replicate all the preparation. If you can document your topic, theme, goals, and objectives, along with documenting the details of the activities you led and information you presented, you might even be able to share your lesson plan with other members of your VMN chapter so they can present the program in the future.
As a VMN volunteer, you will need to document how the program was advertised, how many people attended, and your volunteer service hours. The time spent preparing for the program and the time spent actually delivering it all count as part of the education and outreach volunteer service.
After you provide any sort of educational program, you will want to know what difference it made. Did you successfully achieve your objectives? Were the attendees satisfied with the experience? What went well and what could have gone better? Evaluation of a program helps us answer these questions. Evaluation can be done in many ways and through a combination of approaches.
- Hand out a paper survey form at the end of the program.
- Email a link to an internet survey (Google Forms is an easy tool to use).
- Ask informal questions at the end of the program (for example, “Now that you’ve been on this walk, how many of you plan to return to this park?” or “Raise your hand if you would now like to use more native plants in your landscaping”).
- Follow up on what participants said they wanted to learn at the beginning of the program.
- Ask if the program was helpful and if they would like to know about additional resources.
- Give a quiz to check their knowledge. It can be informal and fun and does not have to be testlike.
- Consider your audience and the setting when choosing an evaluation method. Will the participants be comfortable with and be able to access an online survey? Are they comfortable with reading and writing in English? Is there time and space to complete a written evaluation?
Educational Interactions
Interpretive Talk
What is Interpretation?
The National Association for Interpretation (n.d.) defines interpretation as “a purposeful approach to communication, that facilitates meaningful, relevant, and inclusive experiences that deepen understanding, broaden perspectives, and inspire engagement with the world around us.” Like translating one language into another, interpretation translates the language of natural science or history — what you are seeing at a particular site — into terms and concepts that people can readily understand. Furthermore, it involves doing it in a way that is interesting and entertaining to people of all ages and backgrounds. It is taking something that has little meaning to someone and giving it meaning.
Interpretation can range from what is called “personal services interpretation,” such as personally conducted tours for local sites or program presentations for schools, to “nonpersonal services,” such as signs, exhibits, or interpretive brochures that do not involve a face-to-face interaction.
Freeman Tilden, author of “Interpreting Our Heritage,” was one of the first people to analyze museum guides and park rangers to find out how they captured and held people’s interest at historic sites and natural areas. He selected “interpretation” as the best word to explain what they did and defined it as “an educational activity which aims to reveal meanings and relationships through the use of original objects, by firsthand experience, and by illustrative media, rather than simply to communicate factual information.” He added, “Interpretation is the revelation of a larger truth that lies behind any statement of fact … for the enrichment of the human mind and spirit” (Tilden 2007, 33).
Interpretation is not boring. It is not telling visitors everything you know about a subject, presenting straight facts, knowledge for its own sake, using a lot of technical terms, or speaking in general terms about abstract ideas.
In “Environmental Interpretation,” Sam Ham (1992) writes that what distinguishes interpretation from other forms of information transfer, such as traditional teaching methods, can be summarized as the “interpretive approach”: (1) Interpretation is pleasurable, (2) it is relevant, (3) it is organized, and (4) it has a theme.
To be pleasurable, interpretation should be entertaining and informal, not didactic as in a classroom. It is more like telling a story than delivering a lecture. By being relevant, interpretation is meaningful to people and relates to their personal lives. It is organized, so that it is presented in a way that is easy to follow and does not require a lot of effort from the audience. By being held together with a theme, an interpretive program provides a single message that the audience is more likely to remember and take home with them than a collection of facts.
You may wonder how interpretation is similar to or different from environmental education. The North American Association for Environmental Education (n.d.) defines environmental education as “a process that helps individuals, communities, and organizations learn more about the environment, and develop skills and understanding about how to address global challenges.” Some of the key aspects of environmental education include thinking about systems, developing a sense of place, experiential learning, and focusing on science and sustainability.
Interpretation and environmental education are not mutually exclusive. An interpretive program can use environmental education methods, and an environmental education program will often use many of the interpretive methods described here.
Why do we bother with interpretation, and why is it becoming an integral part of organizations around the world? It has been shown that interpretation can be used as an effective resource management tool, and it helps people understand and appreciate our natural and cultural resources. It has also been shown that when people appreciate something, they protect it. It is that stewardship ethic that the Virginia Master Naturalist program will foster, through its volunteers, for Virginia’s natural and cultural resources.
How To Plan and Present an Interpretive Talk
The audience of an interpretive talk is often made up of free-choice learners, meaning that they are opting to attend the program and may choose to leave at any point. For that reason, it is important to present a stimulating program.
Every talk you give should have an introduction, a main body, and a conclusion. (In other words, tell them what you are going to say, say it, then tell them what you said.)
Begin your introduction by introducing yourself as a Virginia Master Naturalist and welcoming your audience to your talk. The main purpose of your introduction should be to generate interest in your program. It should make the audience want to hear what you have to say. Your opening sentence should pique curiosity and strike a spark of interest. You might make a provocative statement or ask a leading question that relates to your theme. (For example, “How many of you have ever seen a ghost town?” or “If the world is getting warmer, the lives of future generations will change dramatically.”) Your introduction should also orient the audience to the theme of your talk and the main points you will cover.
The body of your talk is the information that supports your theme. Limit new ideas or concepts that you cover to five or fewer. Studies have shown that this is a comfortable number for people to absorb; more will overload their circuits and they will begin to lose interest. As you move from one main point to the next, try to keep your transitions short and simple (“So you can see that …”; “Let’s talk about …”). Smooth transitions help your audience follow what you are saying and help you remember your next point.
The main function of the conclusion of your talk is to reinforce the theme. It is a good time to briefly repeat the highlights of your talk. You might want to mention upcoming events or an update on the VMN program. Let the audience know that you will be available afterward for questions or to talk about the program. A sincere “Thank you for coming” will let them know that your talk is over. Writing down and practicing your conclusion will help you come to a concise and definite end.
Presenting a Talk: Putting It All Together
- Choose a topic (for example, “animals”).
- Narrow the topic if needed (“animals that live in the park in winter”).
- Develop your theme from that topic. (“The animals that live in the park must adapt to the winter weather or die.”)
- Write an outline of the body of your talk using five or fewer main ideas or points to illustrate your theme. (In this example, one main idea could be, “Some animals adapt to winter by hibernating.” You would then talk about animals that hibernate and what hibernation is.)
- Write the conclusion by summarizing what you have said and repeating your theme (the take- home message).
- Write the introduction to your talk. You can more easily write the introduction once you have outlined the body because the main purposes of the introduction are to create interest in what you are going to say, to state the theme, and to explain how your program is organized.
- Rearrange the order putting the introduction first, and tie it all together so that it flows well.
- Practice your talk — over and over! (Practice in front of a mirror or use a friend.)
- If needed, choose a title for your talk (for example, “Surviving the Winter — What’s an Animal To Do?”).
Interpretive Walk or Other Guided Tour
How To Plan and Present a Guided Tour
A guided tour may be a guided walk or hike, a canoe trip, a van tour, a cave tour, or any other kind of presentation where the interpreter leads the group through a preplanned sequence of narrated stops.
People who attend nature programs do not go because they must — they go because they want to. Consequently, your tours should be as interesting and entertaining as possible. Although the main purpose of the tour is not to entertain people, entertainment is an important component of interpretation. If the participants don’t enjoy it, they won’t come back, and they wil be less receptive to your message.
One way to create an enjoyable program is to keep it informal. A casual manner of talking, hands-on and participatory activities, appropriate humor,
storytelling, and two-way participation all contribute to an informal atmosphere. In other words, make it interpretive! Above all, smile and let people know you are interested in them as people, not just as an audience.

If it is possible to register people ahead of time for your tour, consider limiting group size according to the site. For example, a narrow trail may afford little gathering space for everyone to see the wildflowers you are talking about or to hear you from the back; a canoe tour will be limited by the number of boats available; space might be very tight in a cave. On a tour, quality of experience is more important than quantity of people attending. You want everyone to have a positive learning experience — not a frustrating or unsafe one.
Planning and preparing a guided tour is similar to preparing an interpretive talk, but with one added component: Any guided tour you lead should have a staging period in addition to the introduction, the body of the tour (which consists of the planned stops), and the conclusion. (Arrive early, start on time, tell them what you are going to do, do it, end it.)
The staging period is the informal time before the tour actually begins, when you “set the stage” for the activity. Arrive 20 to 30 minutes before the scheduled starting time, informally greet your guests as they arrive, and find out a little bit about them. The more you know about them, the more you can relate to them — where they come from, what they do, what their interests and concerns are. Make an effort to introduce yourself and greet each person who arrives so that all feel welcome and equally important.
Discreetly watch individuals. Do they appear to be physically capable of going on the tour without any problems? If you have any concerns (such as very young children, the elderly, people who are not properly dressed for the activity or weather, or those who need to be told to bring something like a hat or drinking water), discuss them with the individuals privately. Be sensitive to their feelings, be as diplomatic as possible, and consider ways that you can adapt your tour to facilitate their participation if possible.
Every program you give should start on time. Even if people are still arriving or only a few are present, it is important that you not penalize those who arrivedon time. Instead of waiting for latecomers more than a few minutes after the time the tour was slated to begin, plan your first stop within sight of where you met. Latecomers will then be able to catch up with the rest of the group. Begin your introduction but save the more important things until the end of the introduction so that latecomers will hear them.
As with any type of program, start by introducing yourself as a VMN volunteer — including a few words about your background and what you do — and then welcome everyone to the tour. You can tell them about any upcoming programs or activities. Tell them exactly what you will be doing for the tour, and be sure to cover any safety or comfort considerations. This is where you introduce your theme without actually saying “this is the theme of my program.”
From the moment you start talking (and even before), you are establishing your credibility. Be aware of how you present yourself, including your demeanor, what you are wearing, and even the way you stand. You should be thoroughly familiar with the subject and the terrain or waterway where you will lead your tour. You want to come across to the participants as a genial host.
The body of your tour consists of the narrated stops you have chosen to support your theme. When you are planning your tour, choose only stops that illustrate your theme. For example, suppose you want to talk about plant pollination, and you decide on the theme “Wildflowers use some ingenious and even bizarre methods of attracting insects to ensure pollination.” When planning your walk, you might see a lot of wildflowers that you could identify and talk about, but you should limit your stops to only the most interesting examples of pollination strategies. (However, you should be prepared and know the names of the other flowers along the route; you will probably be asked what they are.) If you cannot find enough examples to support the theme you have chosen, you may need to pick another theme.
The time you spend talking at each stop can be anywhere from five to seven minutes, or even longer if needed. There is no ideal number of stops, but you would seldom want fewer than five or more than 15 planned stops. With larger groups, you generally want to have fewer stops.
Try to concentrate the stops toward the beginning of the tour when people are most energetic and interested. Continually monitor your group’s interest by watching body language and listening to what they say. If people seem ready to quit or if you are running late, omit one or more stops. Flexibility is one of the most important qualities an interpreter can have!
Once you have decided on a stop, the first thing you should do is focus the group’s attention on the object or scene that you will be talking about — in this example, a particular flower. Be sure that everyone can see what you are discussing, especially small children. If the group is large and you are on a narrow trail, walk past the object until half the group is past it and then have them stop. Walk back and stand where everyone can see both you and the object while you talk about it.
Begin your narration by making a statement or asking a question that will pique their interest. For example, “If you were a bee looking for brightly colored flowers, would you notice this little plant?” or “This tree you’re standing under was here when the country was first being settled. Imagine the stories it could tell us!”
Next, tell them about the object or feature you have chosen to share with them. This description is the main part of your narration for that stop. Do not tell them everything you know about the particular feature; just tell them what is relevant to your theme. Finally, connect your theme to the description you have given them. The “thematic connector” reveals the reason you chose that particular object or site. (“So you can see that the lady’s slipper is like a funhouse tunnel for bees, with a one-way entrance, some sticky sweets on the way through, and a big room with a large exit sign at the end.”)
When you are ready to leave each stop, a transition statement is a cue for the group to move on. You can simply say, “Let’s move on to the next stop.” However, you can make the group eagerly anticipate what you are going to show them next. You might foreshadow what they will see next by hinting about it, for example, “Next, we’re going to look at a plant that actually changes sex.” You can refer to something you told them earlier or even challenge them: “Keep your eyes open for flowers that look like they have “landing fields” on them to encourage insects to land there,” or “At the next stop, I bet you won’t be able to find the flowers …”. Asking participants a question or giving them a problem to solve keeps them interested in what you are talking about.
The conclusion of your tour usually follows the narration at your final stop. This is when you will reinforce your theme, making the connection one last time between the things you have shown them and the message you want them to remember.
Keep things brief since they may be tired or eager to leave. If you do not end up where you started, be sure people know how to get back. Briefly mention any upcoming programs. End with a statement that lets everyone know that the tour is over (“If anyone has any questions, I’ll be glad to try to answer them. Thank you for coming,” or “I’ve enjoyed our time together, and I hope to see you at some of our other programs”).
Presenting a Guided Tour: Putting It All Together
- Choose a topic (for example, “medicinal plants”).
- Narrow the topic if necessary (“medicinal uses of local plants”).
- Develop your theme from that topic (“For the people who once lived here, these woods were like a giant pharmacy”).
- Prepare an outline — the body of your program — consisting of the stops you plan to make. Each stop should support your theme. Be sure that what you want to point out to the group will still be there when you lead your trip. Flowering plants, signs of animal activity, and fall foliage sometimes disappear! Decide what you will focus on at each stop, what you will say about it (the description), and how you will connect it to your theme (the thematic connector). Then plan a transition statement that wraps up the discussion and prepares them — by sparking their interest — for the next stop.
- Write your conclusion by tying together everything you talked about and repeating the theme — the take-home message — one last time. Be sure you have a clear, concise ending.
- Write the introduction to your program, now that you know what your theme is and what stops you will make to support your theme. Remember that the main purpose of the introduction is to generate interest in your tour and to tell them the theme. You should also introduce yourself and welcome the group to the program. Tell them exactly what you’ll be doing for the tour and be sure to cover any safety or comfort considerations.
- Rearrange the order, putting the introduction first. Read the whole presentation aloud to be sure that everything flows smoothly.
- Go to the site and practice what you are going to say and do with the group. Remember to note the beginning and ending time of your practice run so you can adjust the length of your presentation. The more you practice what you will say and do, the easier your presentation will be in front of an audience.
- If needed, choose a title for the tour (for example, “Nature’s Pharmacy: What Our Ancestors Used Before There Were Walmarts”).
Tips on Tour Mechanics
- Always stay in the lead in order to maintain control of the group. Go only as fast as the slowest person. If you are working with an assistant, have that person walk at the back of the group. Make sure that everyone is engaged and ready before you move on to the next stop.
- Be flexible. You might need to change your route or make fewer stops to accommodate the group. Be sensitive to people’s needs and comfort.
- Always stop and face the group when you have something to tell them, and be sure everyone can hear you.
- Be open to casual conversation between stops but try to avoid being monopolized by the same people. Be sure you share all pertinent information with the entire group. A good goal is to try conversing at least a few moments with each person in your group.
- Be aware of people’s comfort. Do not make them stand looking at you with the sun in their eyes. Take off your sunglasses when addressing the group. If you need to shade your eyes when you are talking to them, wear a cap. Keep stops brief if conditions are uncomfortable (for example, if it is too hot, cold, or windy).
- Stay on time! Studies show that returning late is one of the things people like least about guided tours.
- Repeat all questions that are asked so that everyone can hear them, especially if you are dealing with a large group. Repeating questions is also a good way to be sure that you have understood the question correctly.
- Develop your own style — one you are comfortable with — even when you borrow ideas from others. Make it yours!
What Makes a Good Tour?
- Entertain your audience with meaningful and relevant information that is organized around a theme.
- Be dynamic! Your enthusiasm and love of the resource is contagious.
- Keep people actively involved. Provide hands-on activities. Encourage both adults and children to use as many senses as possible. (Use caution, however, with tasting things. If you are not absolutely sure about something or there are children in the group, do not have them put anything in their mouths!)
- Use your “bag of tricks”: binoculars, hand lens, photographs, maps, shells, field guides, etc. Be sure everyone has a chance to experience what you are showing them.
- Involve everybody by asking questions, but never put anyone on the spot! Asking “How many of you have …?” or “Have you ever …?” can get them involved. Or you can use a statement such as “Think of the last time you …” or “Those of you who live here in …” to involve them.
- If there are children as well as adults in the group, gear your program to them. The adults will go along with it and enjoy it as well. However, be careful to not talk down to people, including children.
- Capitalize on the unexpected (the “interpretive moment”), like the sudden appearance of a bald eagle. If possible, connect it to the theme of your program or simply allow a few moments of silence for people to take it in.
How To Plan and Develop Interpretive Brochures and Signs
The concepts of knowing your audience; identifying topic, theme, goal, and objectives; and knowing your resource still apply, even for nonpersonal interpretation such as signage.
- Identify the audience that will be using your sign or brochure. What is important to them?
- Choose a topic and then a theme for your sign or brochure. If someone views your sign, what is the one central concept you want them to remember?
- Make the theme and content relevant. How can you make the content connect to something that is meaningful for the viewer?
- Tie the information on the sign or brochure to what people can observe around them.
- Limit the information. A very common mistake is putting too much text on a sign. Few people will read every word of a very detailed sign. Capture your theme as a single sentence in larger font so that it stands out and conveys meaning to someone who only reads that one sentence.
- Include graphics. Be sure to only use graphics you have permission to use; do not assume that because it is from a not-for-profit or educational organization that copyright laws do not apply.
- Use a color contrast checker such as Web Access in Mind (n.d.) when choosing colors for the background, fonts, and any graphics that convey meaning so that your materials meet accessibility standards.
- For digital publications, such as Microsoft Word and PDF documents, make sure to use the accessibility checkers that are built in to these programs and make all necessary edits to ensure that the document meets accessibility standards.
- Consider multiple modes for someone to engage with your materials. For example, some VMN chapters have created audio tours to go with signage.
- If producing materials under the VMN name, be sure to use the Virginia Cooperative Extension indicia statement, available at the bottom of the VCE homepage (ext.vt.edu).
Formal Presentations
VMN volunteers frequently give formal presentations, where they are invited to give a presentation for a community group, another VMN chapter, or a conference or other event. These presentations might be in person or virtual, using an online meeting tool. Although in a formal presentation you may not be able to have the audience engage as directly with the resource you are discussing, the general concepts for effective education still apply.
- Identify the audience for your presentation. What is their current level of understanding of the subject matter? Why would they be interested in the topic?
- Choose a topic (if it has not been chosen for you), theme, goals, and objectives. Knowing all these items will aid you in structuring your presentation. Even a 45-minute presentation can still have a theme — that one central concept that you want to get across to the audience to really connect them to the topic.
- Most formal presentations will involve slides. You can, however, also rely on other hands- on materials such as handouts, models, demonstrations, etc.
- As with interpretive signs, slides should minimize text, stick to one main concept/theme per slide, use graphics, be readable, and pass accessibility tests. While it is tempting to use all the background images, animations, and colors that the software offers, usually it is best to keep slides quite simple.
- No matter what audio-visual tools you are using, include interaction as much as possible. It can take the form of a question-and-answer with the participants, asking them to discuss a topic in small groups and then share their thoughts, doing an activity, or asking them to share their own experiences with the topic.
- Practice your presentation to make sure it fits within the allotted time frame, keeping in mind that with a live audience, their questions and comments are likely to add quite a bit of time.
Tables/Booths
Every VMN chapter has had a booth or table at an event at some point. Oftentimes, chapters use their event tables as an opportunity to recruit new VMN volunteers. That is a terrific outcome, but be sure that the main focus of your table is on natural resources rather than on recruitment.
- Identify the audience for your presentation. What is their current level of understanding of the subject matter? Why would they be interested in the topic? Why are they coming to the event? Be aware that community events, such as Earth Day, typically will have multi-aged family groups, so your table should be engaging for both youth and adults.
- Again, the concepts of topic, theme, goal, objectives apply. What is the one main natural resource concept you want people to remember after stopping by your table?
- Provide opportunities for hands-on engagement with the natural resource concept that is your focus. It could be a game, a take-home craft, or any sort of activity that promotes learning and interaction.
- Try to place materials at different heights so that smaller children can also interact with them.
- The most important ingredient of your table display is you! Enthusiastically interact with visitors. Get in front of your table rather than sitting behind it, and actively invite passersby to visit. Ask them questions and give them a chance to ask you questions. You could have a table with no display at all and still provide an effective educational experience through your interaction with the visitors.

Programming for Youth
The preparation for children’s programs begins with the understanding that children best learn nature awareness from direct personal experiences — touching, smelling, seeing, and hearing. (Avoid tasting natural objects when you are with very young children. For children who are old enough to understand, explain that some plants and mushrooms can be deadly poisonous, so they should never taste anything in the outdoors if they are not with an adult who knows what is safe to taste.) For children, knowledge is not as important as doing and feeling.
How can you acclimate children to learning outdoors? You can channel children’s energies away from unorganized play toward organized activities if you:
- Look or experience first and talk later. Children seldom forget a direct experience.
- Tell them how you personally feel and perceive natural objects. Children respond better to observations than textbook explanations.
- Involve children as much as possible. Ask them questions and point out interesting sights or sounds. Include even uninterested children because they are probably not accustomed to watching nature closely.
- Be receptive and aware of each individual.
- Respond with kindness, respect, and honesty to each question and comment expressed.
These strategies can stimulate interest in ecological principles and provide a basis for problem-solving. Be sure to match the interest level to include all the children. Preplan so there are a variety of activities, all related to the same theme.
When developing children’s programs, include the following:
- Develop a central theme for your program. Make sure your theme relates in some way to the site and its resources. If your theme deals with water, go to the water. Stand under a tree to talk about trees.
- Ecological concepts such as habitat, communities, migration, carrying capacity, predator-prey relationships, and nutrient cycling all make good topics.
- Use a mixture of different activities, games, crafts, and hands-on explorations to support your theme. Keep in mind that no children’s program should be lecture-based. It should instead consist of activities reinforced by a brief discussion or explanation. Remember: It is not school, and it should always be fun!
Remember to:
- Be flexible. Some activities may last longer than you planned, and others may end too soon. Always have backup and rainy day activities planned.
- Involve all the children’s senses (except taste!). Many of them have never listened to the wind or taken time to feel it blow on their faces.
- Sometimes it pays to slow down. Do not get so wrapped up in completing every activity that you miss something neat. Some of the simplest things can catch and hold kids’ attention for much longer than you thought.
- Keep competition to a minimum. Nature study should be a cooperative effort.
- Take the time to answer questions, but do not allow one child to monopolize the conversation.
- Set a good example. Pick up litter and encourage kids to do the same. Point out carvings on trees and explain how it hurts the tree. Try not to preach.
- Draw from existing, tested curricula for your activities. Some terrific sources for environmental education curricula include:
- 4-H (4-h.org/resources/curriculum).
- Virginia State Parks: Your Backyard Classrooms (dcr.virginia.gov/state-parks/backyard- classrooms).
- Project Learning Tree: Virginia (plt.org/network/ virginia).
- Virginia Department of Wildlife Resources: Project Wild (dwr.virginia.gov/education/ project-wild).
- Project Wet: Water Education Today (projectwet.org).
Have fun! If you do, the kids will, too.
Above all, put safety first — both indoors and out! Early in the planning stages for any activity involving youth, review all the applicable risk management materials for the VMN program and be sure you are following correct procedures for aspects such as prior training and screening of the volunteers involved, appropriate adult-to-child ratios for the activity, and communication of risk management information (such as avoiding poison ivy) in a way that the participants will understand. Ideally, work with a partner organization that can be responsible for the duty of care for the youth so you can focus on the environmental education instruction.
Conclusion
Whether they are giving a formal presentation, leading a nature walk, engaging a classroom of youth in an environmental education activity, developing content for an interpretive sign, or speaking informally with passersby while working in a local park, Virginia Master Naturalist volunteers have a lot to offer as educators in their communities. Remember the basic skills of an effective educator: getting to know your audience and the natural resources you hope to connect them with; taking the time to plan your educational theme, goals, and objectives; communicating clearly and enthusiastically; and evaluating what you do. Embrace the diversity of your participants and recognize that they have much to offer. With your VMN training and the basic guidelines described in this publication, you will be an effective ambassador for nature in Virginia!
Literature Cited
Avarna Group. 2017. “Instructor Bias Assessment.” Adapted from “Checking My Equity Systems,” by Enid Lee. theavarnagroup.com/wp-content/uploads/2017/04/Instructor-Bias-Self- Assessment.pdf.
Birdability. n.d. Birdability website. Accessed July 21, 2023. birdability.org.
Dam, R. F., and T. Y. Siang. 2020. “How to Develop an Empathic Approach in Design Thinking.” Interaction Design Foundation. interaction-design.org/literature/article/how-to-develop-an-empathic-approach-in-design-thinking.
Ham, Sam H. 1992. Environmental Interpretation: A Practical Guide for People With Big Ideas and Small Budgets. Golden, CO: North American Press.
Kellert, S. R., D. J. Case, D. Escher, D. J. Witter, J. Mikels-Carrasco, and P. T. Seng. 2017. The Nature of Americans: Disconnection and Recommendations for Reconnection — National Report. Mishawaka, IN: DJ Case & Associates. natureofamericans.org.
National Association for Interpretation. n.d. “What Is Interpretation?” Accessed July 21, 2023. interpnet.com/NAI/interp/About/About_Interpretation/ nai/_About/what_is_interp.aspx?hkey=53b0bfb4-74a6-4cfc-8379-1d55847c2cb9.
North American Association for Environmental Education. n.d. “About EE and Why It Matters.” Accessed July 21, 2023. naaee.org/about/ee.
Project Implicit. n.d. “Take a Test.” Accessed July 21, 2023. projectimplicit.net.
Prysby, M. 2022. Safety and Risk Management for Virginia Master Naturalist Volunteers. Virginia Cooperative Extension publication CNRE-124NP (CNRE-158NP). pubs.ext.vt.edu/CNRE/CNRE-124/CNRE-124.html.
Tilden, Freeman. 2007. Interpreting Our Heritage. Chapel Hill: University of North Carolina Press.
U.S. Department of Arts and Culture. 2017. The Honor Native Land Guide. usdac.us/nativeland.
Web Accessibility in Mind. n.d. “Color Contrast Checker.” webaim.org/resources/contrastchecker.
Other Recommended Resources
General Services Administration. n.d. “Content Creation: Create Accessible Digital Products.” section508.gov/create/.
North American Association for Environmental Education. 2022. “Guidelines for Excellence Series Set.” https://eepro.naaee.org/resource/guidelines-excellence-series.
Schonberger, H. L., M. Prysby, K. Reed, A. Salazar, D. Jones, and D. Close. 2023. Teaching Tips and Techniques for Volunteers: A Dialogue Learning Approach. Virginia Cooperative Extension publication FST-284NP (FST-452NP). pubs.ext.vt.edu/FST/FST-284/FST-284.html.
Virginia State Parks. Virtual visits video playlist. https://www.youtube.com/playlist?list=PL0x_xFEmnCB37hGRxN8ej7ZubWZGEsioA.
Virginia Cooperative Extension materials are available for public use, reprint, or citation without further permission, provided the use includes credit to the author and to Virginia Cooperative Extension, Virginia Tech, and Virginia State University.
Virginia Cooperative Extension is a partnership of Virginia Tech, Virginia State University, the U.S. Department of Agriculture, and local governments. Its programs and employment are open to all, regardless of age, color, disability, sex (including pregnancy), gender, gender identity, gender expression, national origin, political affiliation, race, religion, sexual orientation, genetic information, military status, or any other basis protected by law
Publication Date
February 22, 2024